
Admin Posting Permissions
In this article
In this article group
- Share Content to a Company's LinkedIn Page
- Review Share Analytics
- Understanding Leaderboard Point Values
- Social Media Policy Best Practices
- Active User Overview
- Review Posts Analytics
- Review User Analytics
- Understanding Disclosures: How to Create and Use Them
- Block Words From Being Shared Using Blocklist
- Admin Tab: User Management Overview
- Create a Segment
- Create a Private Group and Add Members
- Admin Analytics and ROI Dashboard
- Create Content Emails
- Review Group Analytics
- Group Examples for a Successful Workspace
- Content Email Best Practices
- Create and Customize Leaderboards
- Measure a Program's ROI
- Set Engageable Posts Default Share and Engage Buttons (Post CTAs)
- Release Notes
- Submit an Idea to the EveryoneSocial Product Team
- Require a Social Media Policy During Onboarding
- Branded Content Metrics and Incentives
- Manage Segments
- Update Language Settings
- Upload Custom Stickers to Use on the Mobile App
- Send Users a Message with EveryoneSocial
- View Our Roadmap
- Review Leaderboard Analytics
- View Analytics for Posts with Multiple Share Copy and Image Versions
- Content Email Data
- Manage Content Emails
- Sign up for the Early Adopter Program
- Why is my Leaderboard losing points?
- Delete a Group
- Brand Voice for AI-Generated Copy
- Configure a Group's Settings
- Assign Moderators to a Group
- Company Pages and Data Pulling
EveryoneSocial Admins have more permissions to post content and control a post's share options. This article covers what's available to Admin when creating or editing posts.
This feature is accessible to Admin.
Access a post's settings
Post settings are accessible during a post's creation or editing phase. Check out our article to Publish or Edit Posts in EveryoneSocial.
Admin permissions
Admin have the ability to adjust share settings and how a post is displayed in the Workspace. Here's an image of those settings. We'll dive into each one below.
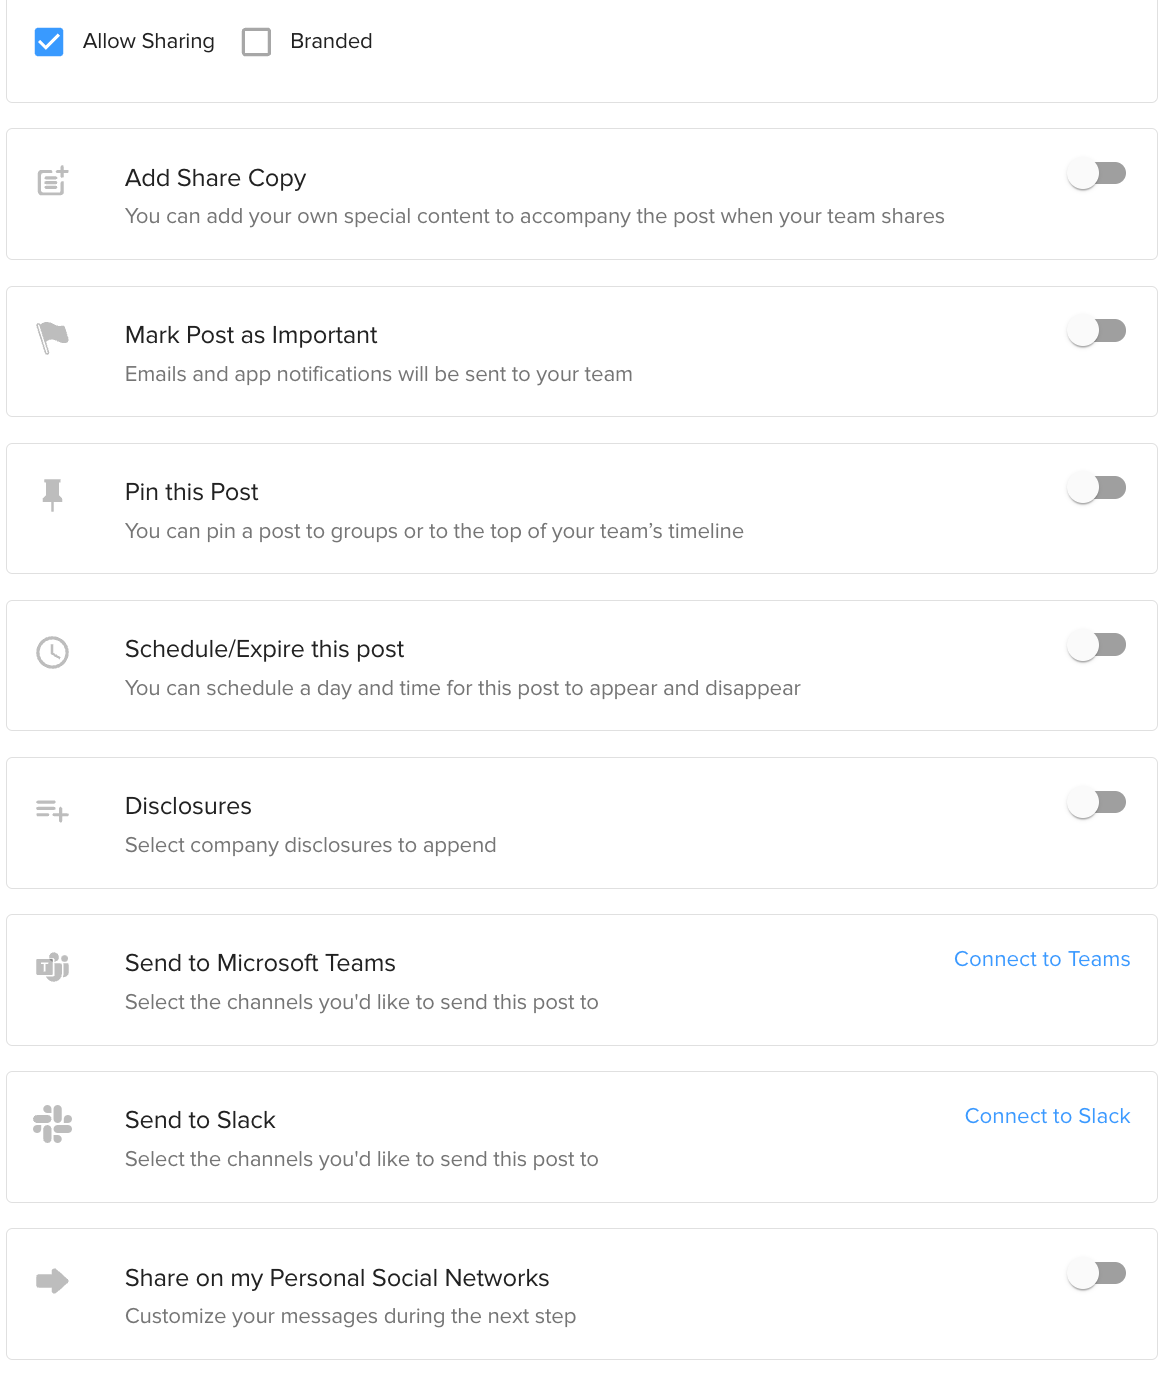
- Allow Sharing: Allow users to share the post to an external network.
- Mark as Branded: Track the content as Branded in Workspace Analytics.
Add Share Copy: Add copy that will be available when sharing the post to a network.
Check Allow Users to Edit Commentary if users can change the share copy.
- Mark as Important: Notify users with an in-app notification and email notification.
- Pin this Post: Pin the post to the top of the selected Groups' Timeline.
Schedule/Expire this post: Schedule a time for the post to be live.
Expired posts will be removed from the Group, but Analytics are still available for the post. Click to learn more about how to delete or remove a post.
- Disclosures: Include required text (Disclosures) with the share copy. Click to learn more about Disclosures.
- Send to Microsoft Teams: Send the post to a Microsoft Teams channel. Click to learn more about sharing to Microsoft Teams.
- Send to Slack: Send the post to a Slack channel. Click to learn more about sharing to Slack.
- Share on my Personal Social Networks: Share the post to your personal networks. Once activated, you will be brought to the "Review and share" page to craft your share.
Learn more about user roles, states, and posting permissions.